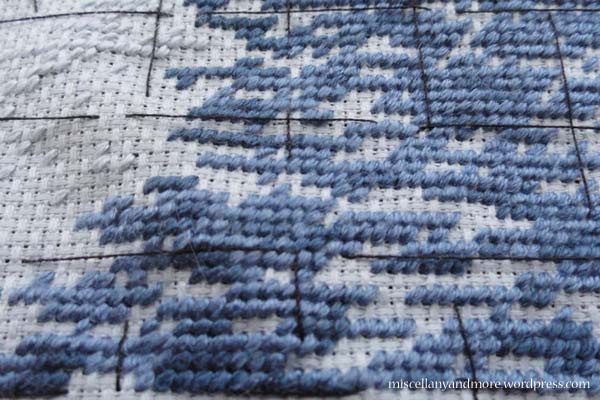
For my current cross stitching project, I’d decided to stitch one color at a time, across the entire piece. I’m currently adding in the second darkest blue in the bottom right.
 I’ve seen quite a bit of information on parking, and a little bit on doing one section of color at a time, but not a lot about doing all of a single color at once. Bearing in mind that I am not at all an expert, here are some tips I’ve found so far:
Plan ahead: If you’re going to be jumping around, as I was, you’ll want to look over each major section of a color when you begin, and keep an eye on the next couple of rows as you stitch, so that when you have to jump to a new section, you can do so with the least possible thread on the back. (Or you could fasten off each end, but that gets obnoxious when you have only two or three stitches in one area.)
Also, before you begin you might want to consider how you’re going to choose your colors. I saw one video where the stitcher went from the most common color to the least common. I, instead, chose to work from the background colors to the foreground colors — I sat down with the pattern, color key, and picture from the packaging and worked out what order I wanted to do everything in, then noted that order on the key.
Have a variety of techniques to start and end threads: As much as possible I’ve been catching the beginning of a thread under the stitches I’m about to make and the end under the stitches I’ve just made. However, that isn’t practical in some cases, such as when I’ve got just one or two stitches in a remote area with no other stitches to help secure the thread. In those cases, I’ve been using in-line waste knots that I’ll secure with later colors to start threads and a similar strategy where I take the tail a distance away that I’ll stitch over and bring it to the front to secure it to end threads (this is another case where planning is critical, as you need to make sure that you’ll actually secure them). If I have an even number of threads, I plan on starting with the loop method.
Be prepared to flip your project over: This is somewhat optional, but because of the way I’ve been securing my thread ends, I have been double checking that I am actually stitching over the threads to secure them. I also tend to run the floss behind any sections I’ve already stitched when jumping to a new area to try to keep the back neater and secure everything better.
Highlight: You’ll definitely need to highlight or otherwise mark up what you’ve done on your pattern, otherwise it’s nearly impossible to keep track of where you are. I’ve been playing around with using different colors of highlighters, but I think the advantage of that is more to do with keeping me from getting bored than actually helping with the stitching.
Grid your fabric: This is a must, since you’ll be moving around a lot and you really don’t want to be counting 153 stitches in from the left… The grid makes it so much easier to pinpoint where to start (3 squares up, 2 over, then 3 down and 0 over within that square, etc).
It’s also useful if you have very similar colors, as I have here:
That’s two shades of dark blue, for the record. Anyway, I found that I had trouble telling if a previous stitch was in the current color or the previous color, which made referencing my location by stitches (for example, stitching along row and stopping two short of the previous color) very difficult. Having the grid makes it much easier to glance at my pattern and determine what color I’m coming up on so I can tell where to stop and move to the next row.
I did grid with black sewing thread as it’s what I had, but it’s a pain in the butt to avoid splitting it. I’d recommend a metallic thread, fine fishing line, or something else that can’t possibly be split during stitching.
Areas of scattered stitches take way longer than areas of solid color: Somewhat obvious, but areas of scattered colors are really a pain, as you have to jump around a lot and double check your counts. I’ve not actually used parking, so I’m not sure if it would be any quicker, but it’s something I’m interested in trying on my next project.

This looks like a really interesting project. What will the final piece be?
Thanks! It’s the Dimensions Morning Flight kit — wordpress apparently doesn’t want to let me link in the comments, but it ends up looking like an eagle flying through snowy woods. You can see the sun in the upper left of this picture, and the dark blue area is either a lake or some dark grass (I’ve not quite decided).
I see. Well it’s a beautiful start! 🙂